A soft scramble is richer and more flavorful than a hard scramble and will turn your good scrambled eggs into perfect scrambled eggs, making your breakfast feel less like a routine and more like a treat. After all, you’re worth it!
Scrambled eggs are arguably one of breakfast’s greatest treasures. Quick to make, tasty and easy to spice up with whatever flavors you’d like, it’s easy to see why they have been a breakfast mainstay for so long.
It’s probably safe to say that most of the scrambled egg recipes you’ve tried have been what are called hard scrambled eggs; cooked on medium-high heat with butter, it’s the fastest and most common way to get easy scrambled eggs and makes for a perfectly fine breakfast.
But, because we can’t help but make things a little less meh and a little more marvelous (and because we believe breakfast deserves to be a little boujee) we think it’s important you know about our good friend, the soft scramble.
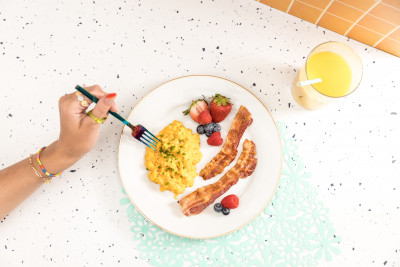
On appearance alone, soft scrambled eggs have a fluffier and more consistent texture than a traditional hard scramble. Almost like you could wrap yourself up in a soft scramble blanket. Just us?
More importantly, a soft scramble is richer and more flavorful than a hard scramble and will turn your good scrambled eggs into perfect scrambled eggs, making your breakfast feel less like a routine and more like a treat. After all, you’re worth it!
How To Make Soft Scrambled Eggs
1. Crack 3-4 (or however many eggs you need for the number of hungry mouths you're feeding) Happy Eggs into a bowl, and season with salt and pepper. Allow this mixture to sit for 10 minutes while you move to step 2. Pro Tip: Add a splash of cream for a little extra umph.
2. Heat a pan on medium-low. This is important! Say it with us: Slow and low.
3. Add just over a teaspoon of butter to your pan until it melts. Don’t adjust that heat!
4. Add in your egg mixture and immediately begin stirring. The more you stir, the creamier your eggs will be. The less you stir, the fluffier your eggs will be. Do what feels right. You’ll find your perfect personal combination over time!
5. After about 10 minutes, check to see that there is little-to-no liquid left in your pan. Voila!


