


STORE LOCATOR
LOOKIN' FOR
HAPPY EGGSNEAR YOU?
Enter your zip code to find Happy Egg in your neck of the woods.

Read more happy

the ultimate dad-approved grilling playlist
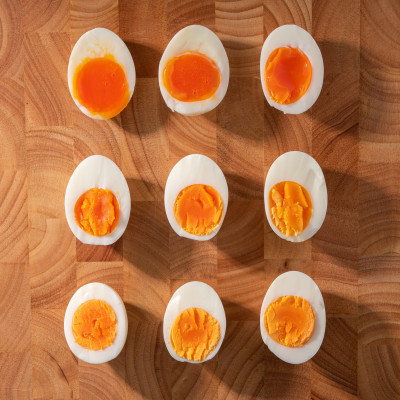
the ultimate guide to hard-boiled eggs

songs to queue at your next garden party

If you spend any time drooling over foodies, chefs, or Michelin-star restaurants on social media, you’ve probably come across cured egg yolks a time or two. At first glance, they look a bit like a hard candy covered in sugar; if the right egg is used, curing results in a beautiful, firm yolk that can be grated into stunning amber spirals, lightly dusting the top of an equally decadent dish.
Rising in popularity over the past few years, cured egg yolks are frequently used as an alternative to grated parmesan— pizzas, salads, pastas, and even eggs themselves can be topped with the golden grates to give it a little extra flavor and umph. Regardless of how you use them, the process of making them will make you feel half gourmet chef, and half mad scientist.
Whether you have egg yolks leftover from a recipe that called for only egg whites or simply want to try your hand at something new, the process for curing egg yolks is simple— but requires time, patience, and a bed of salt and sugar.
What You'll Need
-
4-6 Egg Yolks (We recommend using our Heritage eggs specifically for the most rich-colored yolk shavings!)
-
2 cups sugar
-
2 cups salt
-
1 dish or bowl

How To Make Cured Egg Yolks
-
Combine your sugar and salt in your bowl until evenly blended. (Pro tip: We found using a shallow glass Tupperware container worked well for this and takes up very little room in the fridge while it cures!)
-
Using the back of a spoon, make small divots or depressions into the salt/sugar bed for each yolk. Make sure there’s enough space for each of your yolks to have their own little bed!
-
Carefully crack open your eggs and separate the yolks from the whites.
-
Once separated from the whites, gently place each yolk into its respective divot in the salt/sugar mixture, moving slowly and carefully as to not puncture your yolk.
-
Once your yolks are resting safely, sprinkle them with salt only until lightly covered.
-
Place plastic wrap and/or your lid onto your container, then place in the fridge for 4 days.
-
After 4 days, check on your yolks. You should be able to poke them or pick them up with ease. If they still feel too gummy or not in tact, leave them for another 24 hours.
-
Once ready, remove your yolks from the salt and sugar mixture and rinse each yolk under cold water and pat dry.
-
Heat your oven to 150 degrees and, using a wire rack on a baking sheet, dry out your yolks in the oven until the texture is firm. This typically takes about 1-2 hours.
-
When they’re ready to use, grate them over your dish of choice!
After this, your cured yolks can be stored in the fridge for up to a month— just place them in a sealed container! *Chef's kiss*